
As a precaution you may want to rename your device's Music folder and recreate it. In case you do something horribly wrong and you are syncing TO the computer and delete your phone's music/pics/whatever... files.
The programs used are:
- Conduit for Ubuntu
sudo mkdir /media/gnex
sudo apt-get install conduit
sudo apt-get install mtp-tools mtpfs
sudo adduser YOURUSERNAME fuse
sudo mtpfs -o allow_other /media/gnex
sudo gedit /etc/udev/rules.d/51-android.rules
Paste this in that file (note *1)
- sudo gedit ~/.bashrc
alias android-connect='mtpfs -o allow_other /media/gnex'
alias android-disconnect='fusermount -u /media/gnex'
Use mtp-detect | grep idVendor and mtp-detect | grep idProduct to get the correct values for your device.
Installation is finished. To test your setup run android-connect and you should see you should see the following in Nautilus (file browser). To unmount your device run android-disconnect .
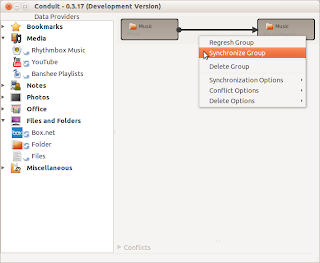
Open up Conduit. Drag two folder providers from the left panel. Right click on the one on the left and set the first folder to sync. Repeat the above for the second "folder" on the right. You may add an option to make it two-way so that new files on the phone are added to your computer.

Now that your gnex folder is browsable setup your sync source and destination.
When you are ready to sync right-click on the arrow(s) and click Syncronize Group. Wait and verify with a file manager on your Android device.
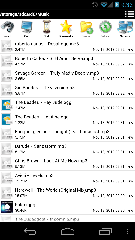
Files are displayed on device App.
Use mtp-detect | grep idVendor and mtp-detect | grep idProduct to get the correct values for your device.
Installation is finished. To test your setup run android-connect and you should see you should see the following in Nautilus (file browser). To unmount your device run android-disconnect .
Open up Conduit. Drag two folder providers from the left panel. Right click on the one on the left and set the first folder to sync. Repeat the above for the second "folder" on the right. You may add an option to make it two-way so that new files on the phone are added to your computer.

Now that your gnex folder is browsable setup your sync source and destination.

Files are displayed on device App.


